Making great pizza dough is not without problems. But once you know what’s caused the problem it’s usually easy to fix. Fortunately, I have made countless pizzas and now I’m going to share answers to some of the most common pizza dough problems.

If there is one secret to great pizza, it’s great pizza dough! So you’re on the right track, since you’re trying to figure out how to make your dough better. So stick at it and before long you’ll be making amazing pizza dough.
Keep reading to find out all about common dough problems and how to fix them. To skip along, you can use the page contents below. Also, feel free to return to the contents by pressing the green button at the top right of the screen.
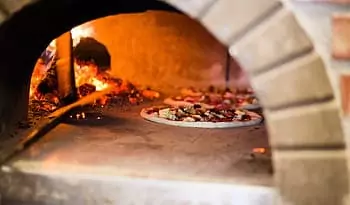
It is worth mentioning here that you can never truly replicate traditional Italian Neapolitan syle pizza in a home oven. This pizza is cooked in a wood fired oven at temperatures of up to 500C/900F and takes just 60-90 seconds to cook!
The extreme heat and the open flames causes the dough to rise very well, and also leads to some charring on the crust. Because the pizza is cooked so quickly, it is crispy and soft at the same time. Pizza that is cooked lower and slower tends to be significantly more crispy.
The traditional brick ovens are huge, expensive, and impractical for most people. However, there are some affordable and portable pizza ovens available on the market.
I use a portable pizza oven from a company called Ooni. Feel free to check out the Ooni website here. They have a wide range of ovens, including wood fired models and gas ones too.


But if you don’t have a pizza oven, don’t worry, you can still make delicious pizza. The dough really is the key. With great dough, you can make great pizza, even in your regular home oven.
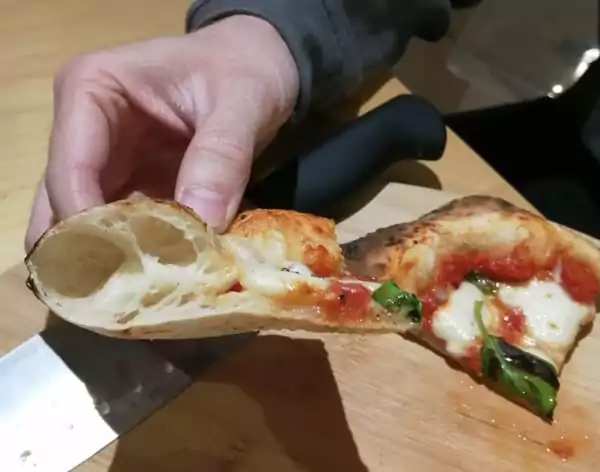
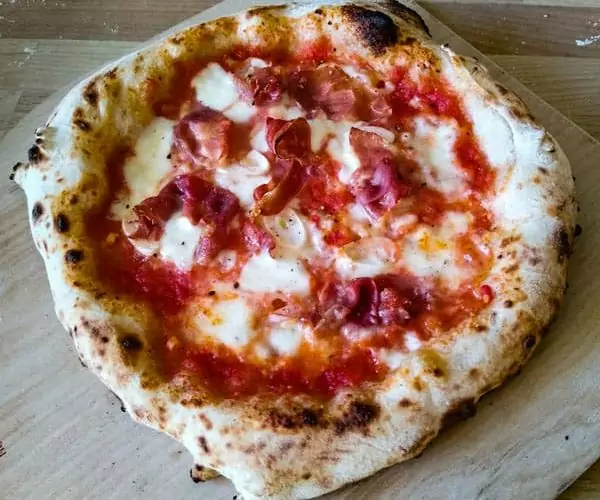
Feel free to check out my recipe for Authentic Neapolitan style pizza if you haven’t already. With practice, you can produce pizzas like the one below!

With that being said, let’s get into the common dough problems.
A doughy pizza is a problem that virtually everyone will struggle with from time to time. Fortunately, there are many fixes to this problem.

Doughy pizza is generally caused by one of 4 factors. I know this sounds like a lot but bear with me, it’ll all make sense soon.
The 4 main issues that cause a doughy pizza are:
The most difficult part is figuring out which of these issues is causing your doughy pizza problem.
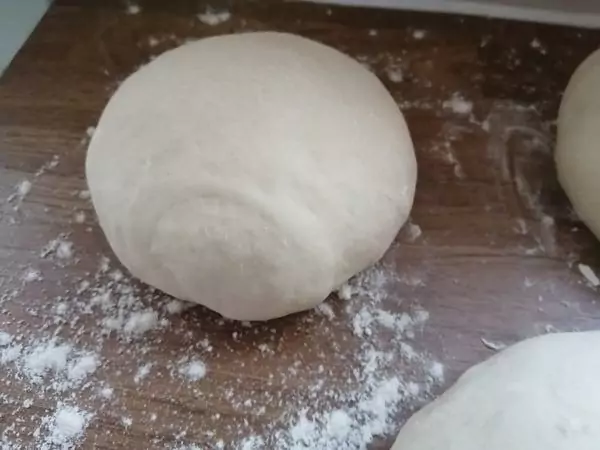
Of all these factors, underproving is probably the most common cause of doughy pizza dough. An underproved dough if cooked would lack any airiness in the crust at all as the yeast hasn’t had long enough to develop. The dough is quite dense.

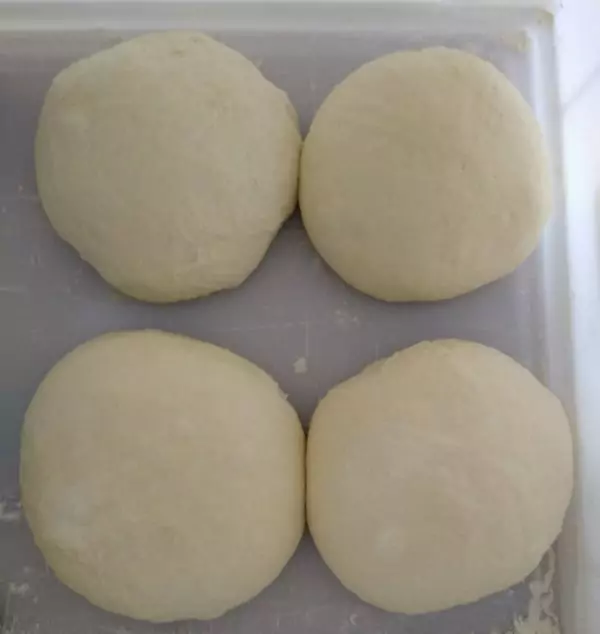
A well proved dough will have bubbles forming in the dough. This helps to achieve a light crust as the pizza cooks. The dough will also expand significantly, reducing the density of the dough.
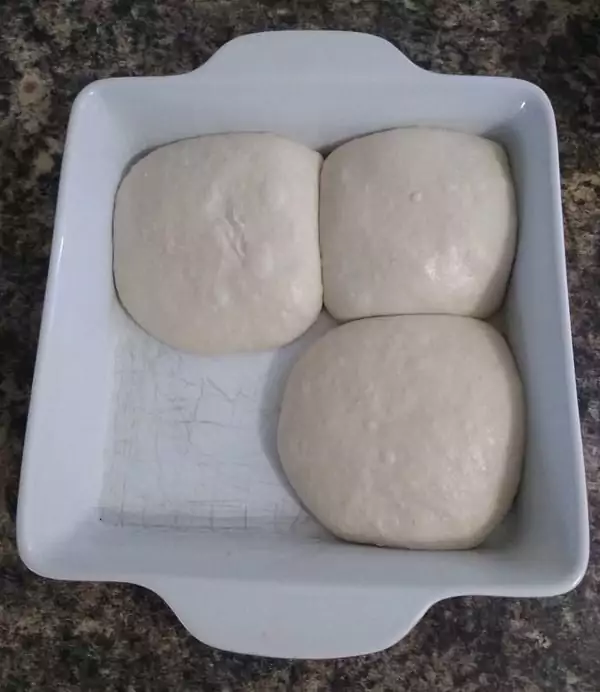
Learning to spot when your dough is properly proved is largely down to experience. But in general you should notice small bubbles in the dough and the dough should’ve about doubled in size (volume).

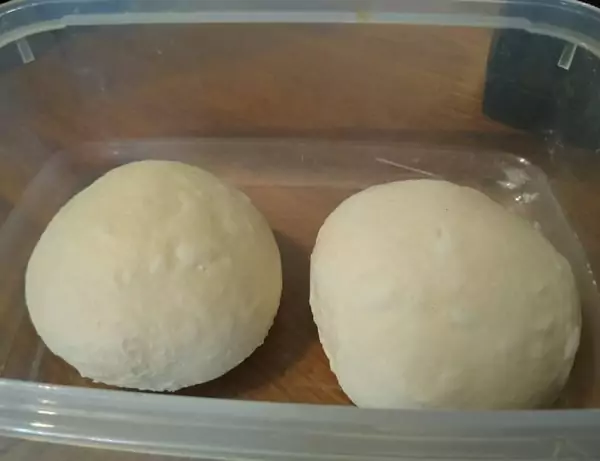
If you don’t have one of these you can use a large dish, like I showed earlier, and cover it with plastic wrap. Or you can use tupaware boxes. But here’s a link to some pizza proofing boxes on Amazon if you want to check them out.
On the other hand, an overproved dough can cause a doughy pizza. Too many bubbles develop and then the dough starts to collapse as it overproves.
Once this happens, the dough effectively goes back to how it was before it was proved and the dough becomes dense again. The dough has lost it’s stretchiness and airiness that it had developed.
This is usually easy to spot as there are often wrinkles in an overproved dough. These wrinkles develop as the dough contracts after having been expanded.

Once dough gets this over proofed, the only option is to reball the dough and let it prove again. Check out my article on fixing over proofed dough here for more information on this.
Even if your pizza dough is properly proved, a low temperature oven can lead to a doughy pizza.
The high temperature of a pizza oven creates an effect called “oven spring”. This is where the dough rises as it cooks. The higher the heat of the oven, the more the dough rises.
This is why pizza ovens create such great pizza. If you don’t have a pizza oven, cook the pizza at the hottest temperature that your oven will reach. Check out my article here to find out the best temperature to cook pizza.
Also, be sure to check out Ooni pizza ovens if you’re interested in taking your pizza game to the next level!
If the pizza is not stretched out thin then it can also become doughy. This is particularly true for the middle of the pizza.
If your pizza is doughy in the centre but quite light in the edges (the crust) then this is probably due to shaping. Be sure to get the pizza as thin as possible in the middle. This will ensure that the pizza is not too doughy and is easy to eat.

Be sure to check out my article (with a video) on shaping pizza here. Getting this step right will allow you to get the most out of your dough every time.
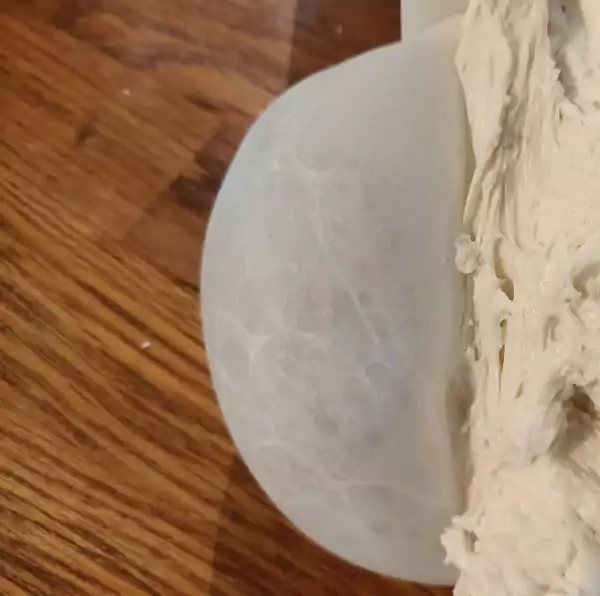
If your pizza dough is too soft it can be difficult to stretch out. In general pizza dough should be made as soft as possible.
However, it is possible to have a pizza dough that is too soft. In my experience this is most often caused by slightly overproved dough.
If your dough is only slightly overproved, once you start to shape the dough all the air will disappear from the dough. At this stage the pizza becomes difficult to stretch and if can start trying to contract.

Even if you manage to stretch the pizza out nicely, the pizza will often turn out a bit doughy. In general, this isn’t a big problem and chances are you’ll still end up with a delicious pizza.
Just bear in mind that your dough could be overproved. If there are large bubbles in your dough then it is almost certainly slightly overproved.
There are many reasons why a pizza dough won’t stretch. But in my experience, the 2 most common causes are an underproved dough and an overproved dough.
As dough ferments (proves) it becomes softer and stretchier. An underproved dough will generally be quite difficult to stretch.
If your dough hasn’t expanded and there aren’t any bubbles in it then it is probably underproved.
However, a dough that is overproved can also cause the same problem. Once a dough has expanded to it’s peak, it starts contracting back.
If left too long, the dough will contract significantly and will become very resistant to stretching. In general, this is the worst of the 2 evils.
In my experience, you are better off working with a slightly underproved dough than an overproved dough. It will probably cause less problems in the long run.
In most cases it is possible to save a dough that won’t stretch. Fixing it doesn’t take a lot of work but it does take time. A pizza dough that won’t stretch can be one of the most frustrating pizza dough problems.
Keep reading to find out how to fix it. Also, bear in mind that experience counts for a lot. Practice, practice, and practice – you’ll develop a sixth sense for pizza dough!
If your dough hasn’t risen yet and is underproved, you can simply leave the dough longer before shaping. If you are in a rush, you can try to put the dough in a warm place (making sure it is covered well at all times).
Be careful though as if the dough gets too warm it can dry out or kill the yeast. The best thing to do it simply to wait until the dough is ready.
If your dough is only slightly overproved then you can try knocking back your dough. This basically means removing the air from the dough and reballing.
You will then need to leave the dough for at least 30 minutes to prove again. The dough will gather its strength back as it is reballed.
However, it will need time to relax and prove again before it becomes stretchy enough to be made into a nice pizza. This could take anywhere upwards of 30 minutes depending on how much yeast you’ve used.
Click here to check out my article on knocking back. In my view, it’s one of the key techniques to learn for any form of baking involving yeast!
Pizza dough that is too sticky is a very common problem but it is actually really easy to fix. Sticky dough is almost always caused by a dough that is too hydrated.
This basically means that you have added too much water to your dough. Check out my article here on pizza dough hydration.
Many people like to use a high hydration (above 60%) as they think it will create a lighter pizza dough. Whilst this can be true, a high hydration creates a very sticky dough which is much more difficult to work with.
A sticky dough is no fun, you will find it difficult to stretch out thin. And a thick pizza leads to a doughy pizza.

In addition, you may find you need to use lots of flour to stop it from sticking to the surface. This flour can then cause a thick crust on the dough, leading to burnt chewy pizza.
To avoid this, I recommend a hydration of 56-58% for 00 flour or 58-60% for Strong White Bread flour. I would only recommend going higher than this if you really know what you are doing and you want to experiment.
Check out my pizza school series which feature in depth videos. In the first episode I mix the ingredients and provide the perfect recipe for easy to work with dough.
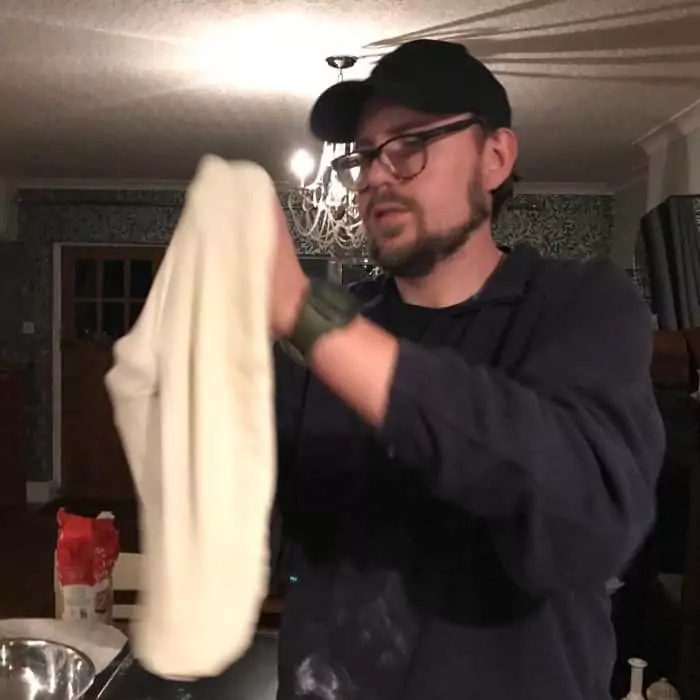
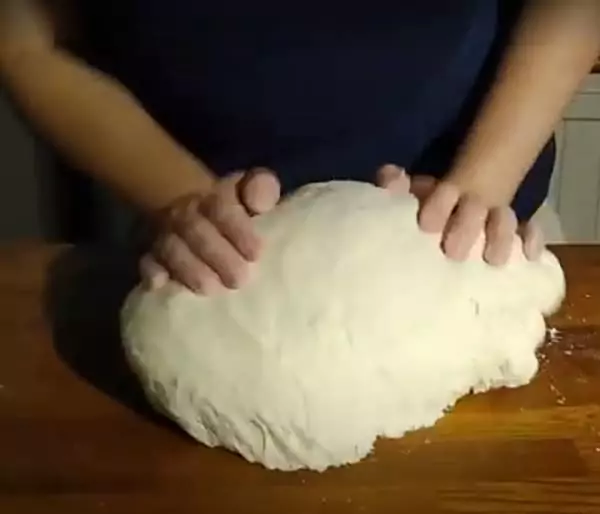
Fortunately, fixing sticky pizza dough is very straight forward. Simply knead flour into the dough until the dough becomes firm, smooth, and not sticky.
Just add a small handful of flour at a time and work it into the dough. Then decide whether to add more flour if the dough is still sticky.
Once you have got a dough that is no longer sticky, you’re good to go! Be sure to allow the dough rest for at least 30 minutes before balling. You will also need to allow the dough time to prove.
If you don’t have time for this and you’re ready to make pizza, don’t worry. When you shape the pizza just be sure to use plenty of flour so that the dough doesn’t stick to hour hands or, more importantly, the surface.
I find that using a bowl with plenty of flour in is the best way to flour your dough. Simply place your sticky pizza dough in the bowl and coat thoroughly on both sides.

Using plenty of flour will make the sticky dough much easier to shape. Too much flour can lead to a burnt base so try to only use as much flour as you need. You may find you need a lot though to be able to shape the dough. Use your feel!
Make sure you check out my article with a video on shaping here. The shaping is so important but also probably easier than you think.
Unfortunately, we have all experienced a pizza dough that tears when stretching. It can be infuriating but don’t worry, you can learn how to fix it.
In my experience, pizza dough that tears easily is generally caused by one of two issues.
The 2 issues are:
If your dough hasn’t been kneaded well (or stretched if using my no-knead recipe) then your dough will suffer with inadequate gluten development. This means that your dough is lacking strength and when you try to stretch your dough it will often tear.

To check if you’ve built enough strength in your dough you can try the windowpane test. If your dough passes this test then your dough is nice and strong. If your dough fails then you can knead the dough some more to build up strength. Check out my article on how to tell if your dough is needed enough here.
If you have time, you can knead your dough (to build up strength) and let it prove again. But this could take as long as another 4 hours to prove.

If your dough tears as you are shaping, you can patch it up. Take a small pinch of dough from another dough ball or from the crust of the one you are shaping. Place this over the tear and hammer it down with the heel of your hand.

This should patch the dough up, covering the tear. It is important at this stage to ensure that your pizza is not stuck to the surface. Gently lift the pizza with your hands and rotate it on the surface. You should be saved!
Pizza dough can quickly dry out if left uncovered or if it is not kept in an airtight container when proving. Fortunately, this is easy to fix.
If your dough is dry and is starting to form a skin, the pizza will not shape well. The pizza will be very difficult to stretch and will form a strange chewy crust as it cooks.

The best thing to do is to wet the dough slightly and reball it. This should make the dough nice and moist again.
Then leave the dough to prove again for at least 30 minutes. After this, you should have a wonderfully soft dough again.
One of the advantages to using a pizza proofing box is that it creates an airtight seal so that your dough doesn’t dry out. Feel free to check out some pizza proofing boxes on Amazon if you haven’t got any.
In reality, pizza dough cannot sit out for any amount of time uncovered. The only time your dough should be uncovered is when you are shaping the pizza.
As the dough is proving it should be left in an airtight container. If you don’t have one, a good solution is a bowl/dish covered with cling film.
Many recipes recommend covering with a damp towel but I don’t recommend this method. Over time the towel dries out and then your dough will start to dry out. A damp towel is only OK if you intend leaving your dough under it for a short period of time (less than an hour).
If your dough is too tough to knead, I have a simple solution for your pizza dough problem. Simply leave your dough covered for 30 minutes to an hour.
During this time, your dough will relax and should become much softer and easier to knead.
This method is actually called an Autolyse and is a method commonly used by artisan bakers. As the dough relaxes it also becomes more hydrated as the flour absorbes the water.
When you return to the dough you should find it much easier to work with. Hopefully, it will be a joy to knead.
Another possible cause of tough pizza dough is too low hydration (not enough water in dough). But in my experience most people use too much water rather than not enough.
Leave your dough to rest first and see if this solves your problem. If your dough is still tough to knead then add a little bit of water a splash at a time and work it into the dough gradually.
You will probably find the dough becomes a little sticky. But after a while the dough will absorb the water and should become soft. Leave the dough to rest again before balling up.
The are many different pizza dough problems that we all have to deal with from time to time. But there’s almost always a fix so there’s no need to panic.
In fact, I almost never stick to a recipe exactly. There are so many variables that are constantly changing. Such as the type of flour, the temperature, the humidity, the yeast, and so on.

As the old baking proverb goes; “watch the dough and not the clock”. Let the dough tell you what to do rather than getting frustrated when the doughs not doing what you want.
Feel free to check out my Authentic Neapolitan pizza recipe here.
If you’re new to making pizza, take a look at my no-knead pizza dough recipe here. It’s super easy!
Good luck and let’s get making great pizza dough!

I’m Tom Rothwell and I’m super passionate about all kinds of homemade pizza! In the last few years I've been on a quest to find the perfect pizza. Now I'm sharing what I've found out with the world!
If you're interested in hiring me for your event in the UK, feel free to check out my website with the link below.
Pizza Catering


I often get asked what type of oven I use for my pizzas. Well, I use a pizza oven made by a company called Ooni.
The range of pizza ovens that Ooni offers is just brilliant. They cover all bases, and all price points. There's affordable and portable models such as the Fyra 12 Pizza Oven and then there's state-of-the-art models such as the Karu 16 Pizza Oven pictured below.
In all honesty, I would say that the oven makes a huge difference. If you're looking to make authentic Italian pizza, a pizza oven is a must.
By clicking the link below and purchasing from Ooni, you would be supporting this website. I've been using their ovens for a long time now and I wouldn't recommend them if I didn't believe in their products.
Time to make some amazing pizza!

I’m Tom Rothwell and I’m super passionate about all kinds of homemade pizza! In the last few years I've been on a quest to find the perfect pizza. Now I'm sharing what I've found out with the world!
If you're interested in hiring me for your event in the UK, feel free to check out my website with the link below.
Pizza Catering


Hi there, love all the tips and advice. I’ve followed your poolish recipe but my dough balls are flattening out and becoming quite flat and thin as they prove. Do you know what could be causing this? Am I spacing them too far out in the dough tray?
Thanks in advance.
Hi Ed, glad you’re finding the site useful. Dough balls flattening out is perfectly normal and generally not something to worry about. Spacing them out well is fine, it typically makes them easier to shape.
But if you are struggling with shaping, you could try reducing the hydration by 1-2% next time. This will make a slightly drier dough which should be stronger and hold it’s shape better. If you missed it, you can check out the article on hydration here.
Good luck!
Hi we make our pizza dough and let it rise, then cut it into balls and roll them, and put in dough trays. We put dough trays into walk-in and and use mostly next day.
Problem with some trays dough is too tough and can not figure out where we are going wrong. We measure out everything so it’s all the same. Not sure on water temp. We put our dough after mixing into a plastic 5 gallon bucket, damp cloth over top. When it rises to top so it looks like a mushroom on top, we roll it and then cut with dough divider.
Can you over rise dough, will this make it to tough? It’s too tough to roll out for the pans. Can not figure it out. Thanks hope you can help, look forward to hearing from you, Bill
Hi Bill, there’s a number of things that could be causing the issue. I think it’s unlikely that the water temperature is the problem so I wouldn’t worry about that.
Are the dough balls airtight in the dough trays? If they are forming a skin this is a sign that they are not air tight and are drying out.
I assume that all the trays get the same amount of proof time? Overproving can cause toughness but it could also be underproved. Is the walk-in the same temperature throughout?
How much yeast do you use and how long do you prove before balling, and at what temperature? What temperature is your walk-in?
If you could answer the above questions for me please Bill, I may be able to help. Thanks
Hi Tom
I have a problem with timings
I’ve been using your recipe using a poolish and I’ve got it to a point now where it’s lovely.
But the next problem is that the balls continue to prove and expand over the next few hours.
By the time I’ve got round to using the last of my balls the dough has proved beyond the point where it usable and needs to be reballed.
Would you have any suggestions for a suitable dough that proves but stays useable for three or four hours ?
Would a 24 dough work, and do you have a recipe.
Thanks in advance again
Hi Campbell, yes a longer prove would definitely help with that. In my latest pizza school series I do a 24 hour dough which you could try here, it’s actually a little easier than the poolish.
Or you could halve the amount of yeast and go for a 48 hour prove which would help even more.
But if you want to stick to poolish you could try halving the amount of yeast in the poolish which should double the prove time. So you would prove the poolish for 20 hours and then prove the dough for a further 20 hours.
The other option if you’re making lots of pizzas, is that you could ball the doughs at different times. Eg ball 1/3 of the dough balls at 6 hours (before shaping), 1/3 at 4 hours, and 1/3 at 2 hours. This way you’ll have at least a 4 hour window to work with. Just be sure to use the dough that is the most proved each time.
I hope this makes sense. Good luck!
Hello! Please can you recommend a decent Mozerella? The tesco cheap stuff taste like rubber! Thank you!
Hi Sally. From the supermarket, I have found Galbani to be quite nice. But I agree that the cheaper ones are probably not worth using.
If you’re getting a rubber flavour though, it could be that the mozzarella is overcooking.
If you are using a pizza oven, make sure you are not cooking the pizza for more than 90 seconds. If you are using a regular home oven, I would advise experimenting with adding the mozzarella later so that it doesn’t burn. For example, try cooking the base (with tomato sauce on) for around 1-2 minutes before adding the mozzarella and finishing off.
It could also be worth experimenting with both the fresh mozzarella (in brine) and the dried mozzarella. Some people prefer one over the other. I like both personally, though the fresh stuff is more authentic.
I hope that helps Sally. Good luck!
Hi Tom
Great tips. Always trying to get more ‘spring’ and reading interest technique.
Love the tip on the crossing the pointing fingers to make a circular finger shape when stretching. Makes sense.
My question: the use of semolina. I flour the dough out of the tray for stretching, but then my kids love that grainy semolina on the bottom of the pizza. Does a little bit is semolina make any difference at all? Apart from aesthetics and ‘feel’?
Dom
Hi Dom, personally I’m not keen on semolina. I find it tends to burn easily and produce quite a strong flavour.
I prefer to use a high quality Italian 00 pizza flour (such as Caputo). These are designed to withstand high temperatures and are therefore quite resistant to burning.
I then try to ensure that the shaped pizza has as little flour on the base as possible prior to launching. It needs just enough to prevent sticking and no more.
But of course, much of it is personal preference so feel free to experiment and see what you like best!
Thanks for the question and good luck!
Hi, I recently did a 2 day ferment with wholemeal bread flour (60% hydration). It looked really good but when I stretched the dough and cooked it in the pizza oven, I didn’t get that fluffy outer edge.
Any suggestions why that happened? I suspect it was the fact I used wholemeal flour but thought I would ask.
Hi Lisa, thanks for the question. I would also suspect the issue is due to using wholemeal flour.
00 pizza flour (such as Caputo) is what I always recommend for pizza. It is specifically made to be soft, stretchy, and light to produce the desired effect in the pizza.
What you could experiment with is mixing pizza flour with wholemeal flour. You shouldn’t have any issues using 20% wholemeal, for example. You could also experiment using higher amounts.
I hope this helps and good luck!